| Version 6 (modified by , 6 years ago) ( diff ) |
|---|
Deploying OpenAirInterface through OSM in Orbit
Description
This tutorial will guide you through running the OpenAirInterface (OAI) platform (www.openairinterface.org) in Orbit by using the Open Source MANO (OSM) orchestrator. The Orbit testbed will be used as a distributed datacenter, with its nodes being used for hosting OAI VNFs.
Hardware Used
- 2 Generic Grid Nodes for running the OSM stack and the Virtual Infrastructure Manager (VIM)
- 1 Grid Node with USRP B210 and as many other nodes used as compute infrastructure.
- Images Used: oai_compute.ndz for the compute nodes, oai_vim.ndz for the VIM node, and oai_osm.ndz for the OSM node.
Make sure before starting that the VLANs 1000 and 1001 are open over the Orbit data network (eth0 interface on all nodes) otherwise the orchestration will fail. If not, ask for an administrator to help.
Setup
- To get started, make a reservation on the Orbit scheduler for using the Grid nodes. The tutorial assumes that at least one of the compute nodes has a USRP B210 attached on them.
- Once the reservation starts, log in to the grid console and load the images on the testbed nodes. Before doing so, verify the state of all the nodes in the testbed:
nimakris@console.grid:~$ omf tell -a offh -t all
nimakris@console.grid:~$ omf stat -t all
If the nodes report in POWEROFF state, then go ahead and load the images on the nodes:
nimakris@console.grid:~$ omf load -t node8-7,node1-5 -i oai_compute.ndz
nimakris@console.grid:~$ omf load -t node1-1 -i oai_vim.ndz
nimakris@console.grid:~$ omf load -t node1-4 -i oai_osm.ndz
- After the images are loaded on the nodes, you need to turn them on, with the following command:
nimakris@console.grid:~$ omf tell -a on -t node8-7,node1-1,node1-4,node1-5
- Once the nodes are up and running (you can test this by sending a ping command) log on the nodes as root
- In order to prepare the compute nodes for orchestration, do the following
nimakris@console.grid:~$ ssh root@node8-7
root@node8-7:~# cd compute/ && ./setupBridges.sh
If the compute node has a USRP B210, also apply the following commands:
root@node8-7:~# /usr/lib/uhd/utils/uhd_images_downloader.py
root@node8-7:~# uhd_find_devices –args="type=b200"
- On the VIM node, do the following:
nimakris@console.grid:~$ ssh root@node1-1
root@node1-1:~# ./setUpBridges.sh
root@node1-1:~# lxc start openvim-two
#set the following iptables rules so that OSM can communicate with our VIM
root@node1-1:~# iptables -t nat -A PREROUTING -p tcp -i eth1 --dport 9081 -j DNAT --to-destination 10.201.38.210:9081
Where 10.201.38.210 is the IP address provided by LXD to the container hosting the VIM. The VIM that we use is OpenVIM, which comes with the default OSM package.
Now you will need to setup the container hosting the VIM. To do so, from the node console do the following:
root@node1-1:~# lxc exec openvim-two – bash
root@openvim-two:~# ifconfig eth1 10.154.64.9/22
root@openvim-two:~# ifconfig eth2 10.154.72.9/22
root@openvim-two:~# ip addr add 169.254.169.254 dev eth1
root@openvim-two:~# sudo iptables -t nat -A POSTROUTING --out-interface eth0 -j MASQUERADE
root@openvim-two:~# sudo iptables -A FORWARD --in-interface eth1 -j ACCEPT
The two networks are running over two VLANs over the data network of Orbit, one used for managing the VNFs and the second one for experimenting with them.
Verify that the compute nodes are registered with the VIM, otherwise no VNFs will be able to be placed over them.
root@openvim-two:~# openvim host-list
3842da04-971a-11e9-bba2-00163e7c9892   node1-5
c06e484c-9679-11e9-8a99-00163e7c9892   node8-7
Here we see that node1-5 and node8-7 are being used by the VIM as the compute infrastructure.
Finally, start the mdserver, used to provide the Cloud-Init functionality (e.g. scripts that will be executed on startup of the VNFs). These scripts are useful to setup correctly all the properties in the OAI configuration files and allow its correct operation.
root@openvim-two:~# mdserver /etc/mdserver/mdserver.conf
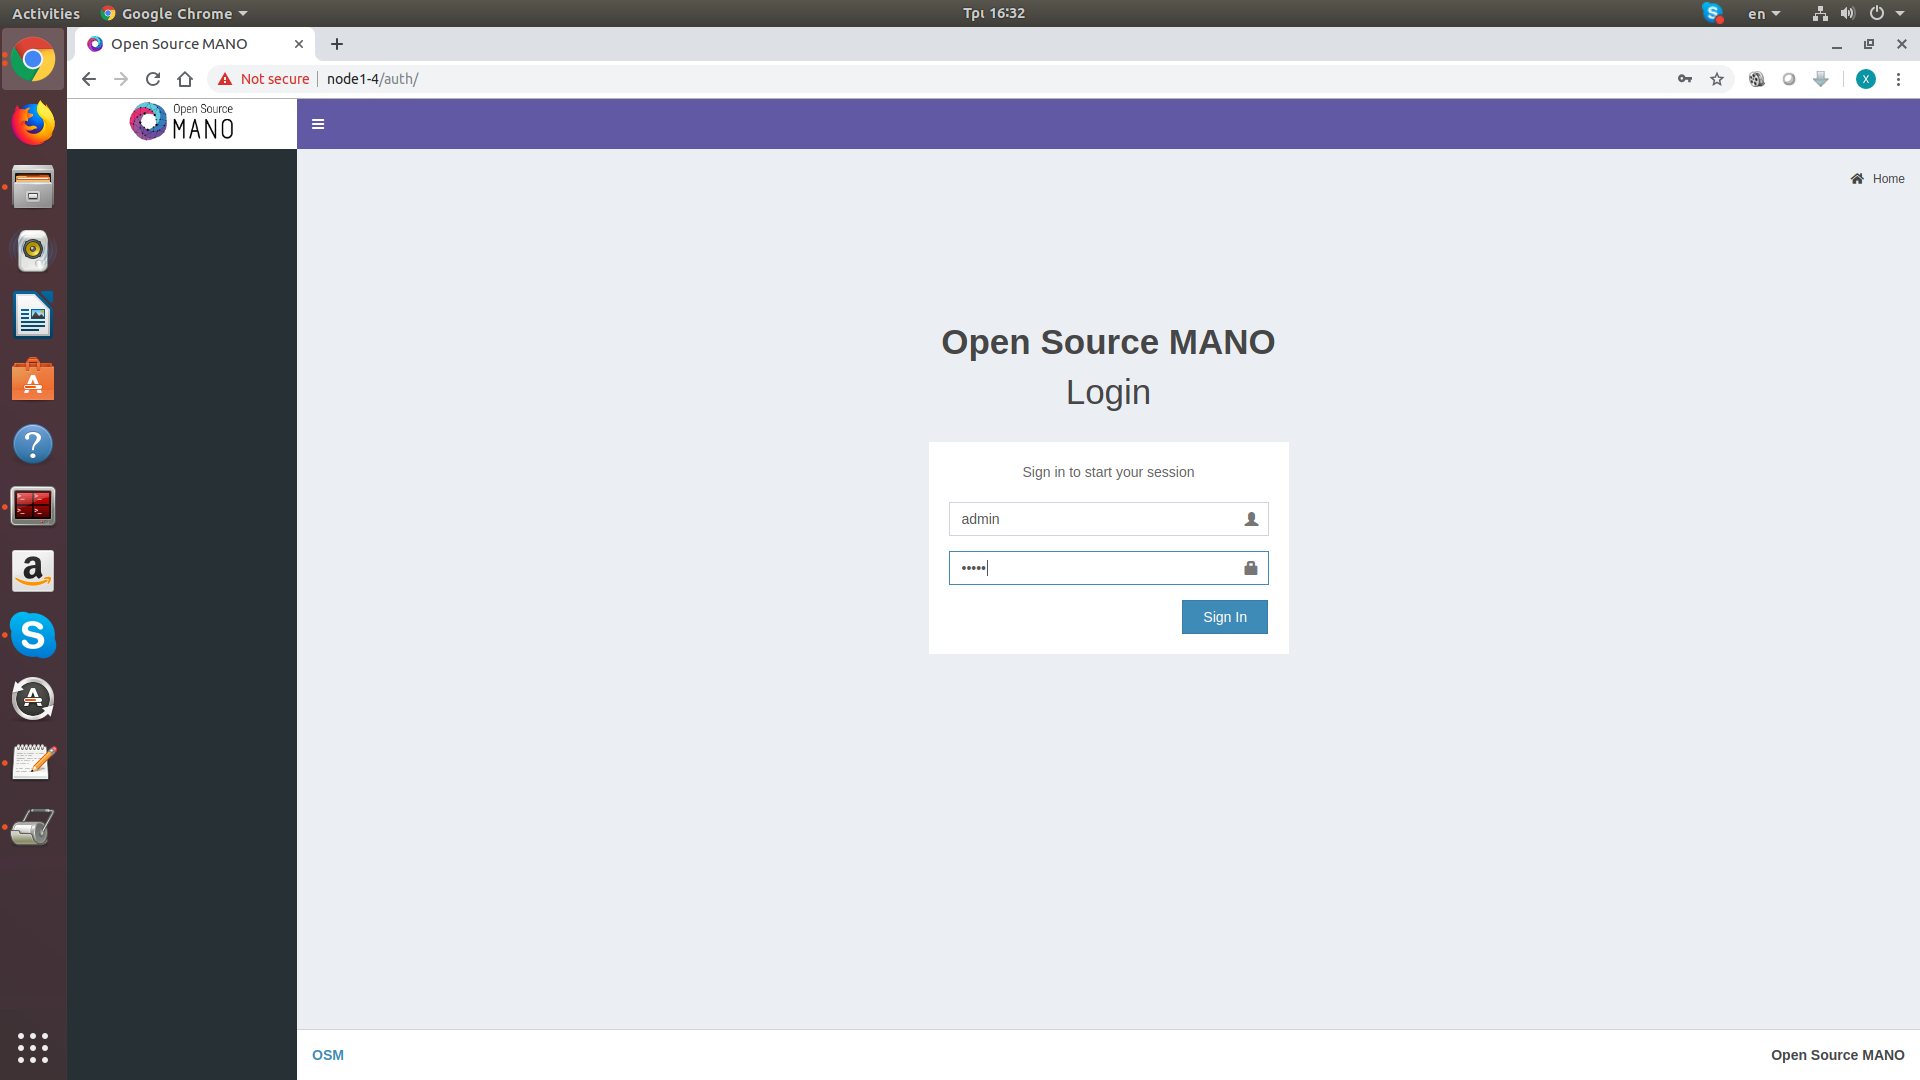
- On the OSM node, open a shell to either the grid console or the node directly, point the browser to the OSM node's address and you will receive something looking like the following:
Use the following credentials to login: user: admin, password: admin
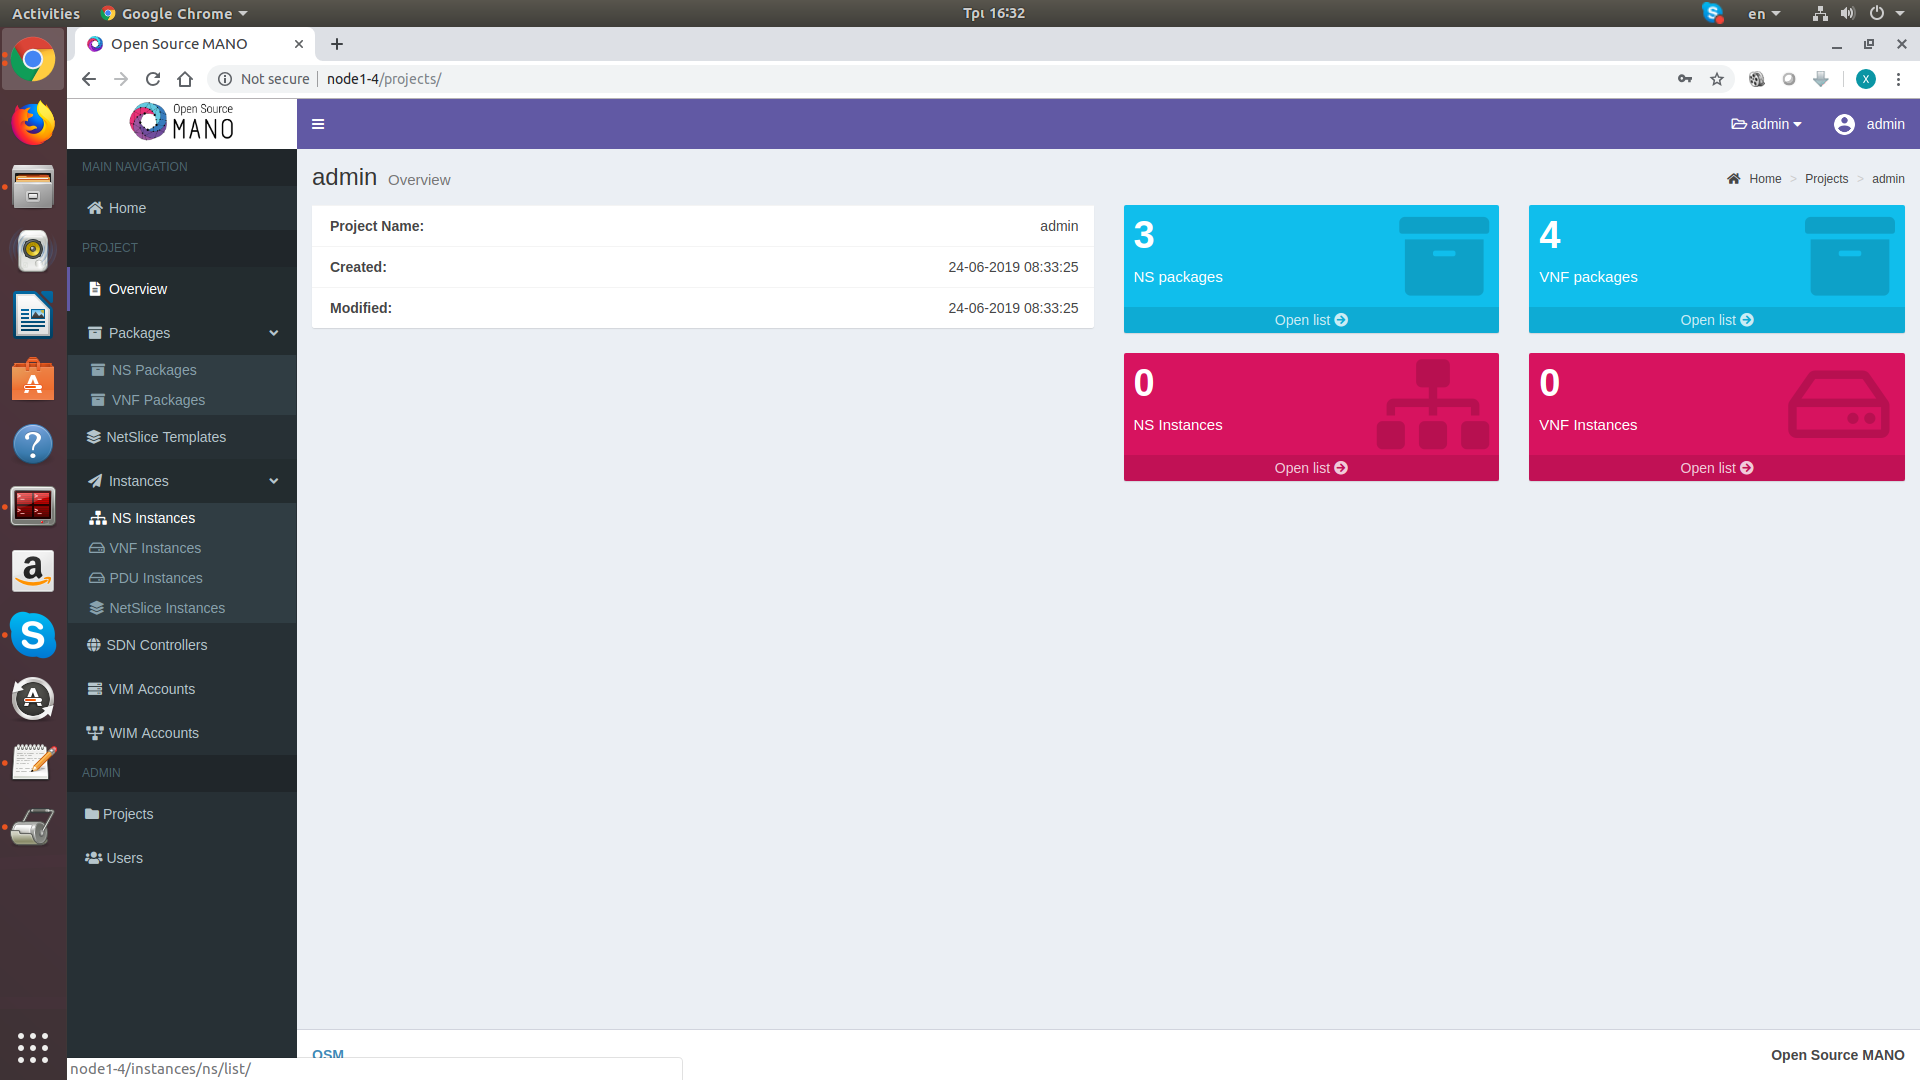
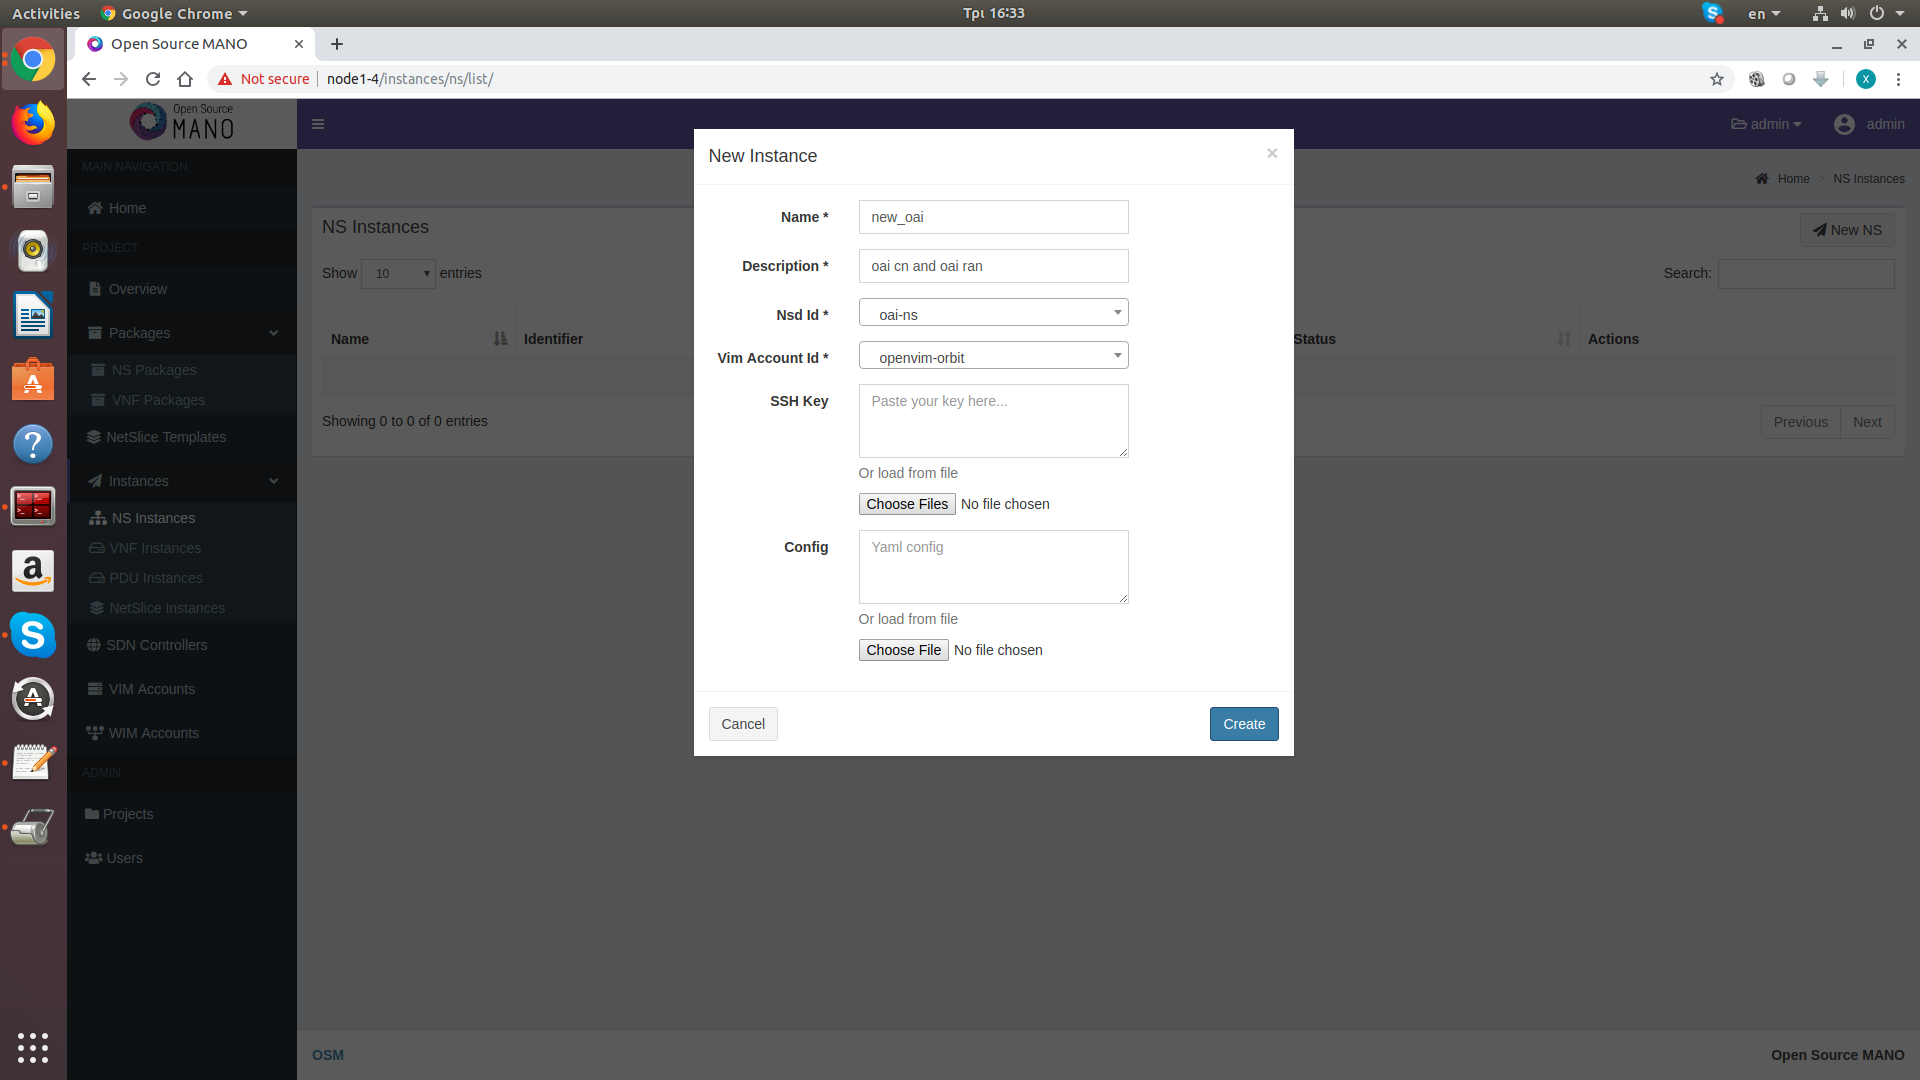
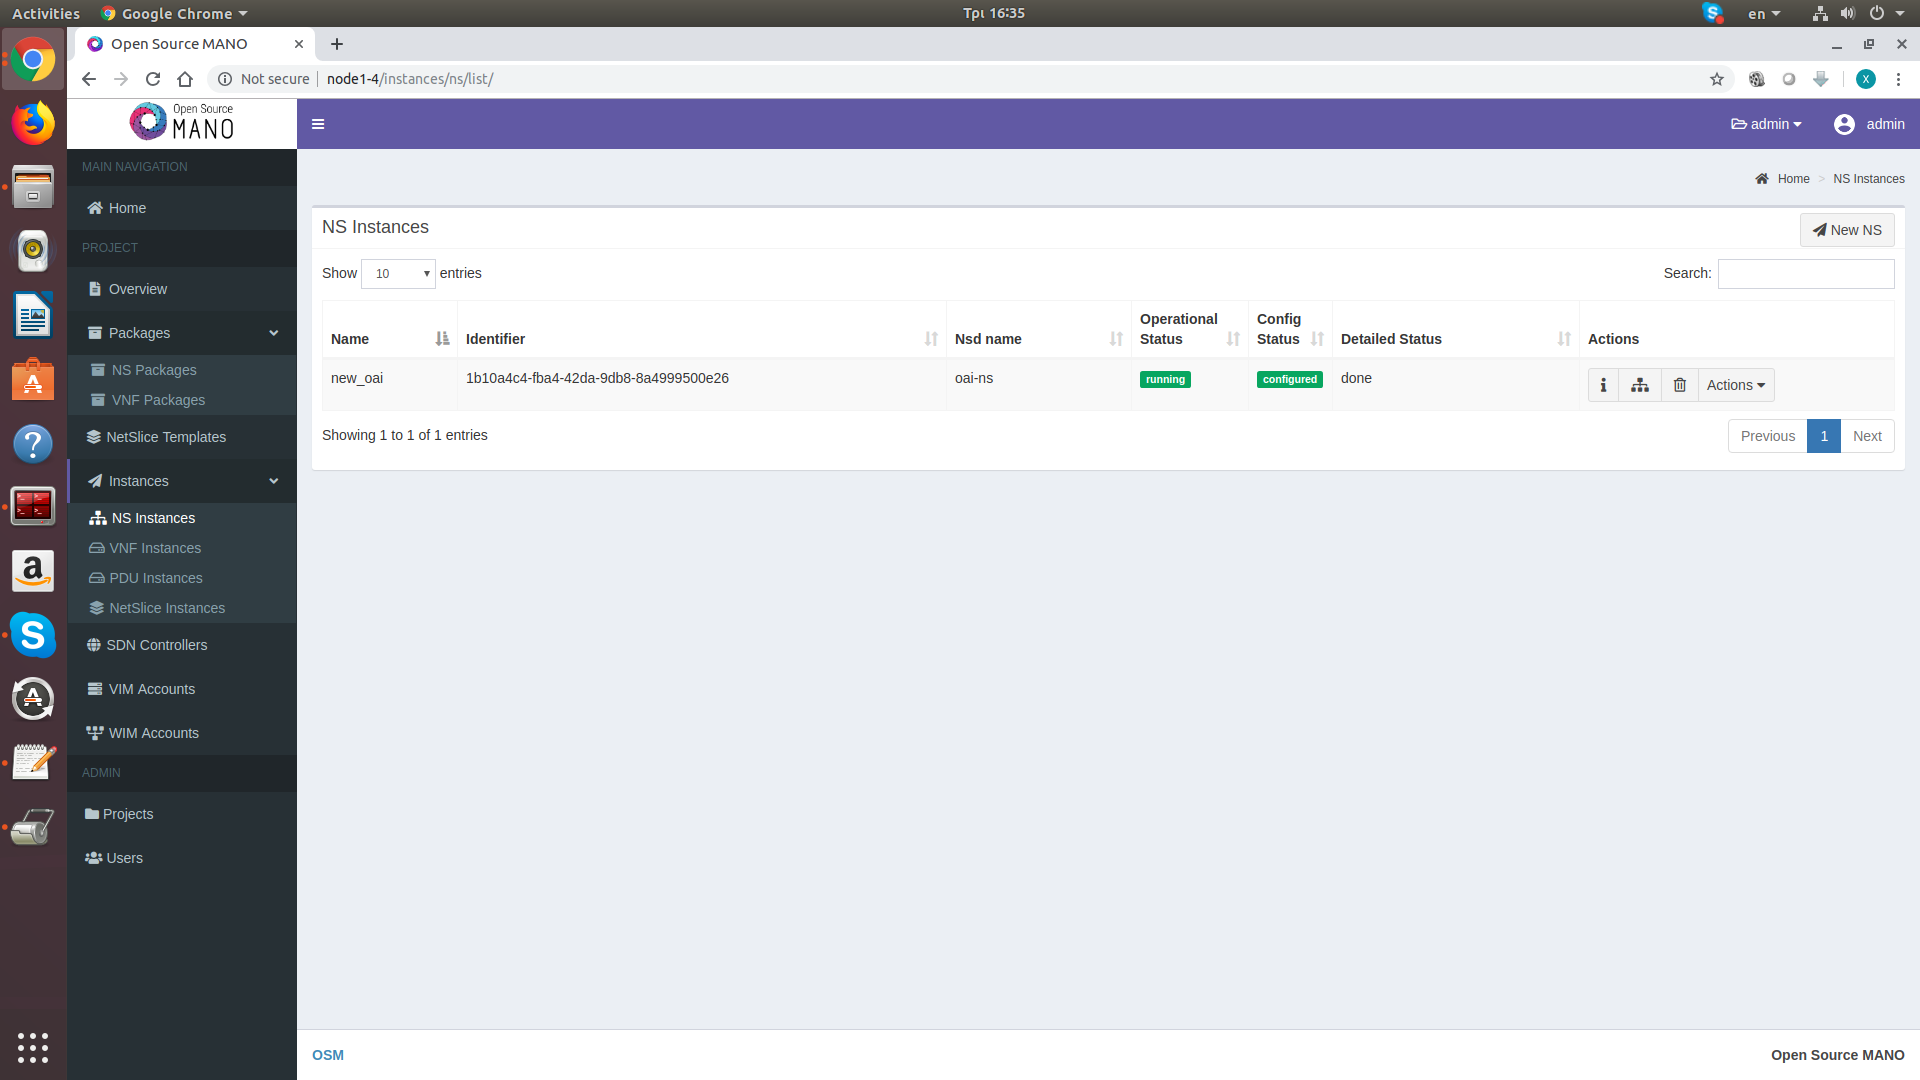
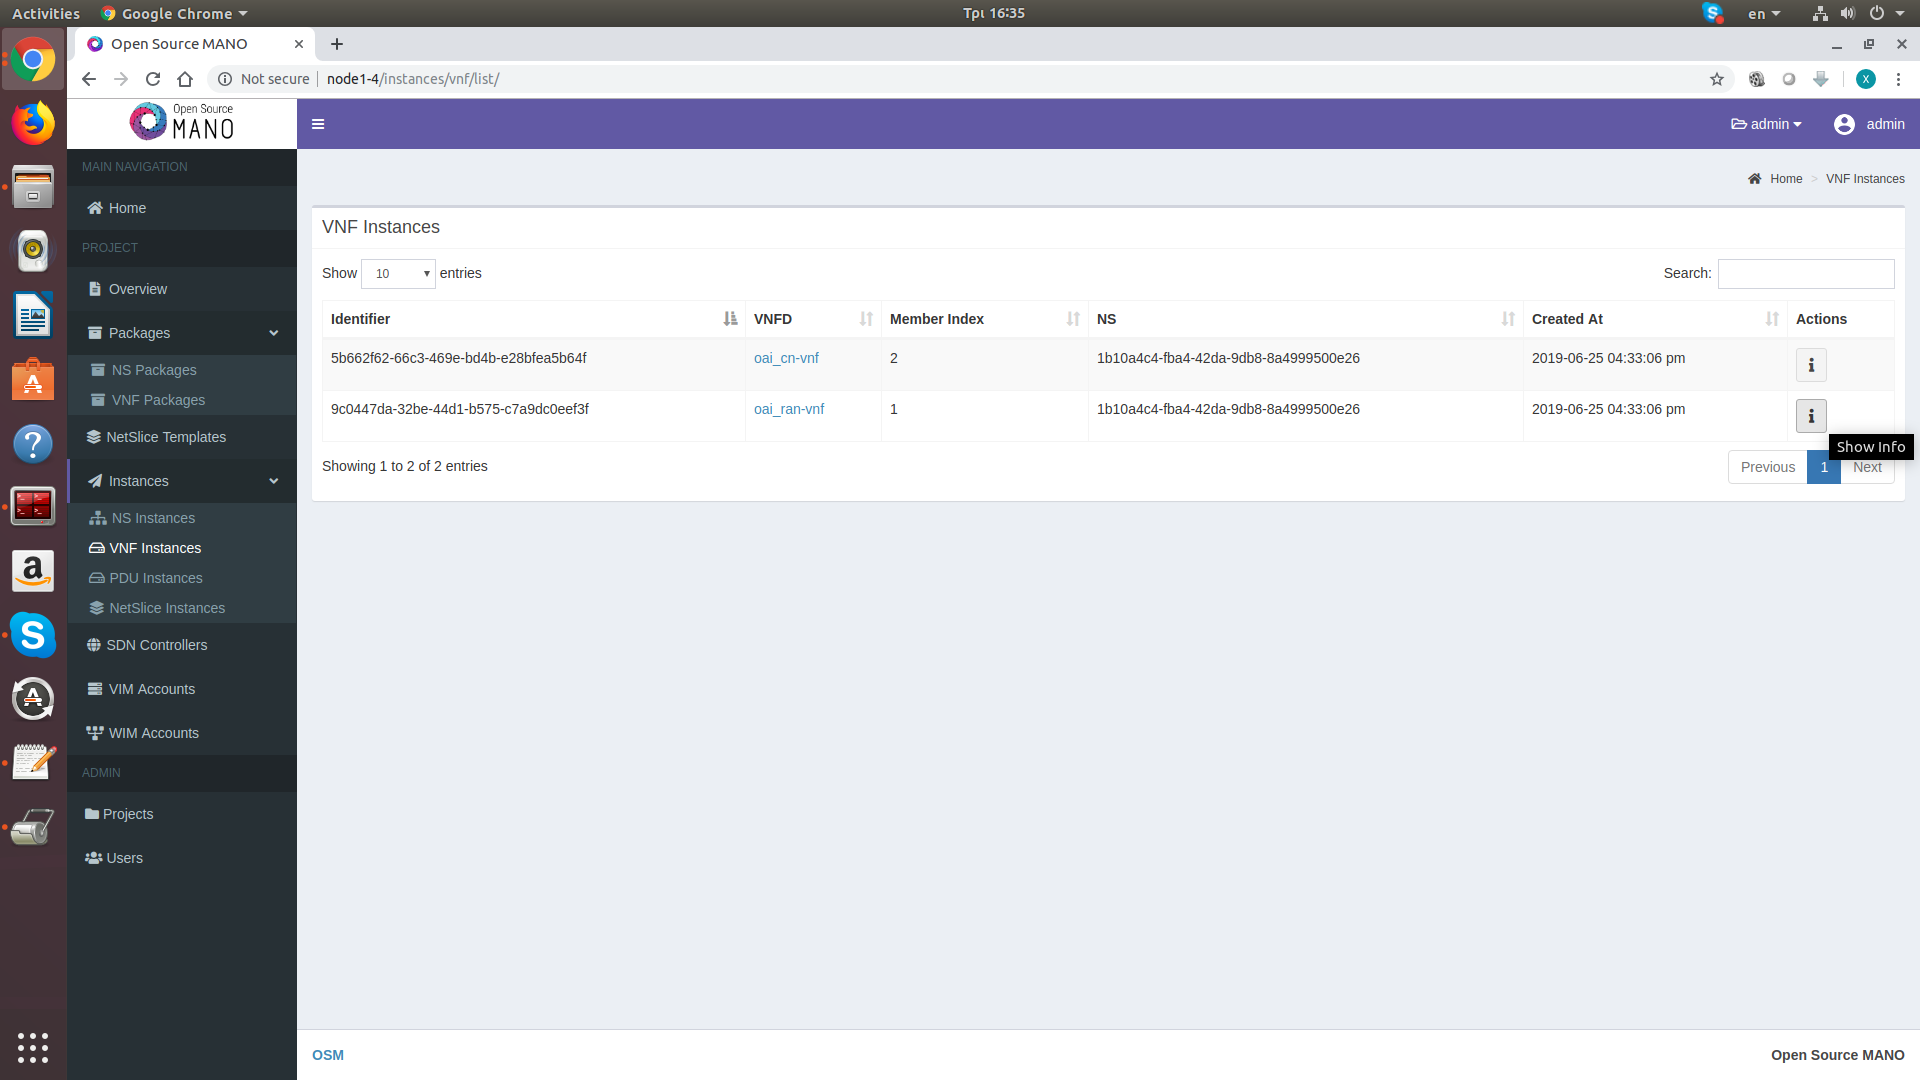
Now navigate to the Network Service (NS) instances and select to instantiate a new NS. From the dropdown menu, select oai-ns as your Network Service Descriptor (NSD) ID and openvim-orbit as your VIM account. Then press create in order to instantiate the VNFs. This service description will deploy two VNFs in the testbed: one containing the OpenAirInterface Core Network, and one containing the OpenAirInterface eNodeB.
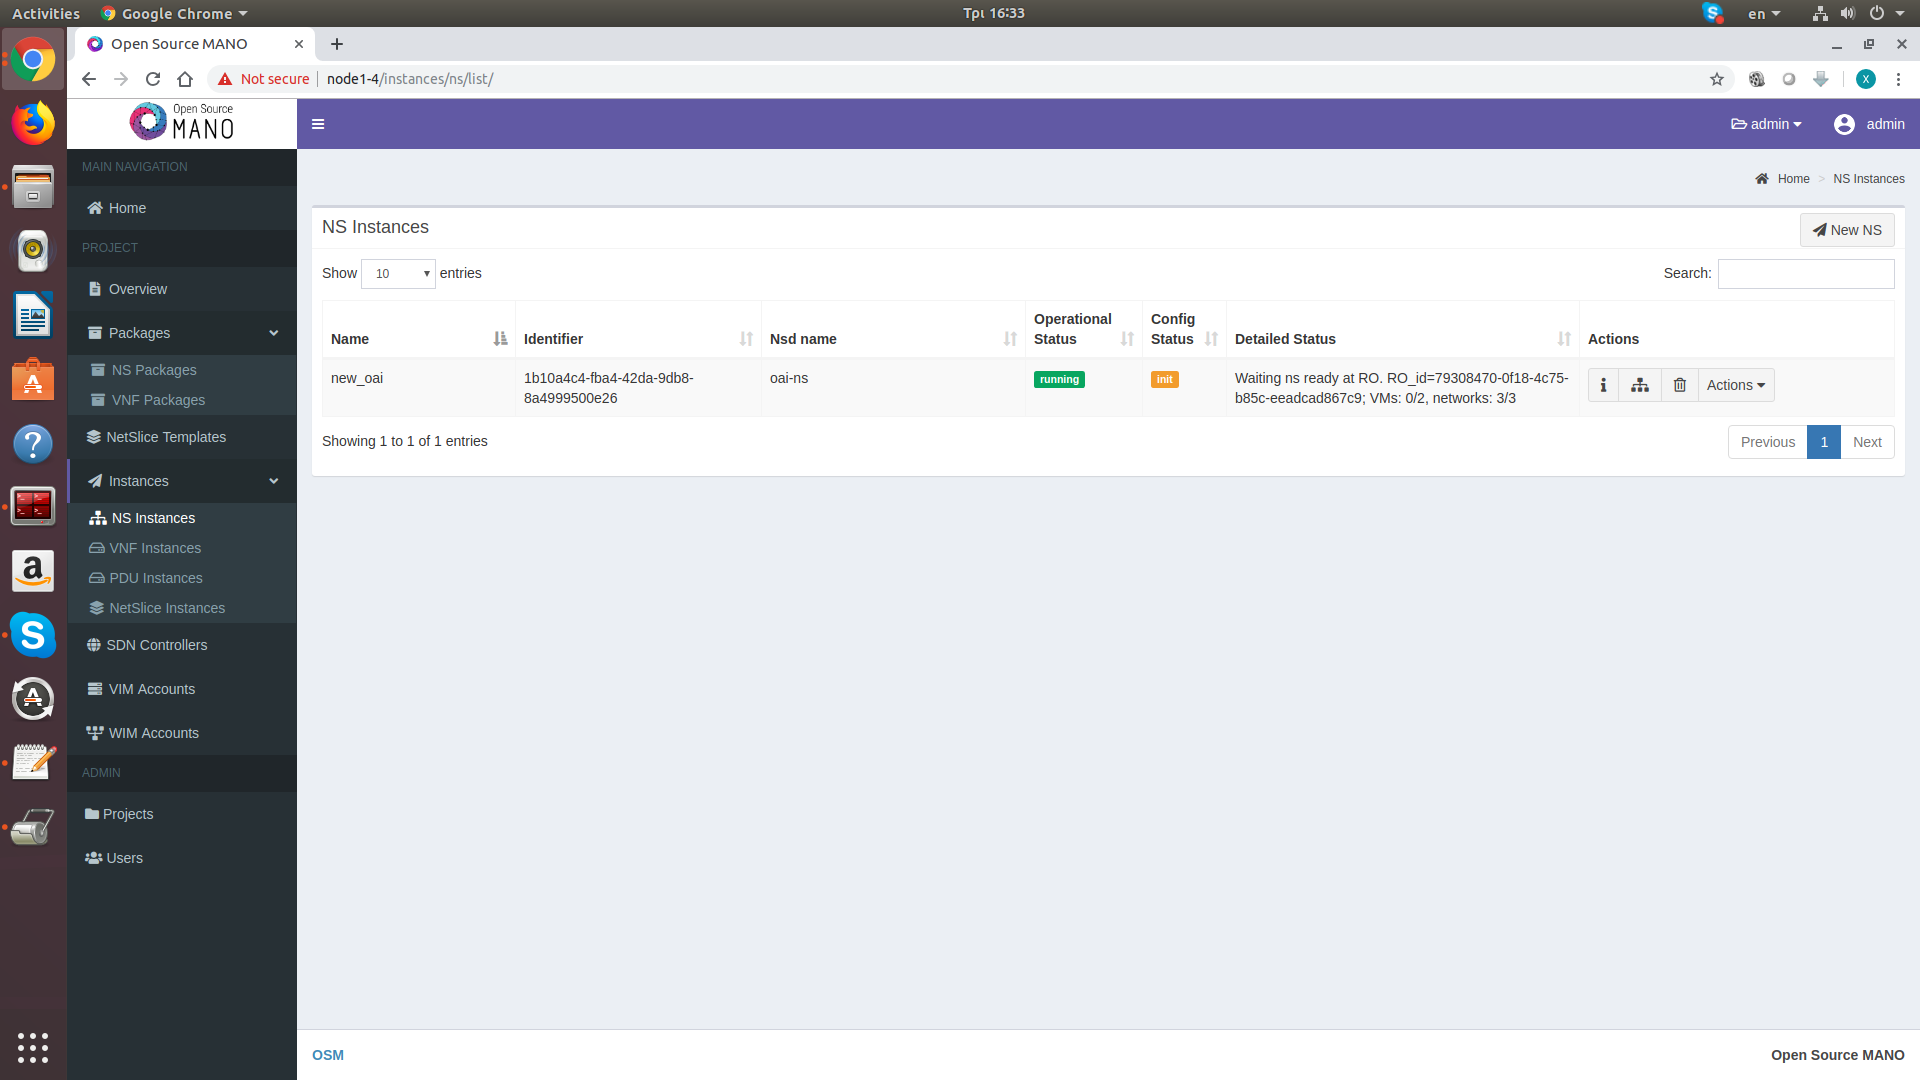
Instantiation takes some time, so when the process is completed, you cannot attach any UEs to the network. The startup scripts take care of adding all the Orbit UEs to the HSS database, configuring the PLMN to 00101, and configuring the eNodeB instance to correctly communicate with the Core Network.
Once the process is completed, you may attach a UE to the network. In order to attach a UE to the network, follow the instructions for the LTE UEs of Orbit, mentioned here: Available Devices, Connecting an LTE UE to the network. All the Orbit UEs are already registered with the HSS, so they should require no further configuration. The default APN that you should use with this network is oai.ipv4. You can use the lte-ue.ndz image for loading it on a node equipped with an LTE dongle. The image has pre-installed all the required drivers for attaching the LTE dongle on the node, and only requires from you to send the commands for attaching it to the network.
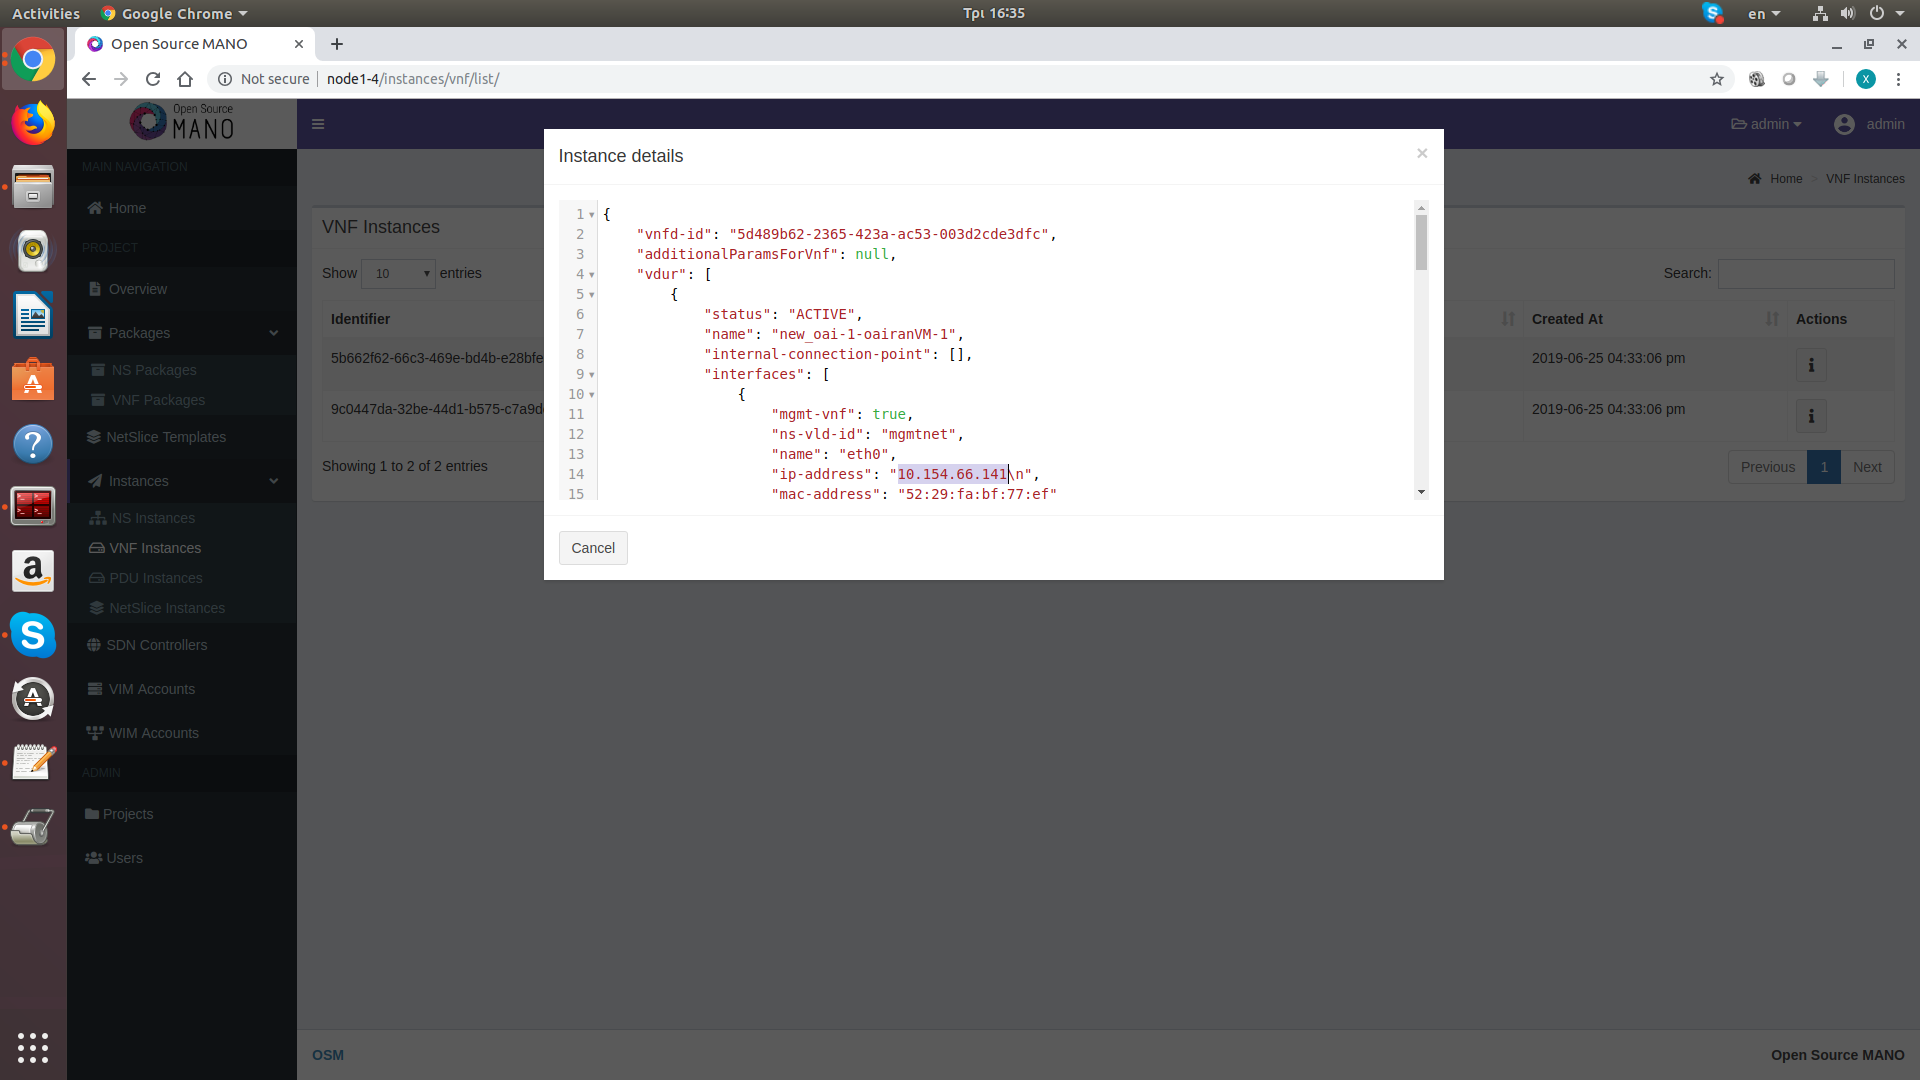
If for any case, your dongles do not see the LTE network, maybe it is either stopped or it operates in a different band. Navigate to the deployed instances in order to get the IP address of each VNF.
Now you can connect directly on the VNF and debug if needed, through the OpenVIM container.
nimakris@console.grid:~$ ssh root@node1-1
root@node1-1:~# lxc exec openvim-two -- bash
root@openvim-two:~# ssh ubuntu@VNF_ADDRESS
The default user for accessing the VNFs is user: ubuntu and password: osm4u
Attachments (7)
- osm-login.png (104.2 KB ) - added by 6 years ago.
- osm-dashboard.png (164.4 KB ) - added by 6 years ago.
- osm_waiting.png (168.0 KB ) - added by 6 years ago.
- osm_nsd_instantiation.png (172.7 KB ) - added by 6 years ago.
- osm_instances_address.png (191.8 KB ) - added by 6 years ago.
- osm_instances.png (170.3 KB ) - added by 6 years ago.
- osm_completed.png (160.1 KB ) - added by 6 years ago.
Download all attachments as: .zip

